DESTINATION: HOW TO PACK YOUR BIKE FOR A TRIP
ONE WAY (OUT OF 101 OTHERS OUT THERE) TO PACK YOUR BIKE AND A PICK-WHAT-YOU-NEED LIST OF WHAT YOU MIGHT WANNA PACK ALONG FOR THE TRIP

Going on a bike trip is one of the best way to boost that fire in you for more two-wheel actions. Whether it is a dedicated bike trip with your bike buddies or a family trip with a cycling segment squeezed in, the fun is … guaranteed. Just thinking about riding in some foreign trails and enjoying that fresh (or familiar) trail already make our hearts skip a beat. But one small chore needs to be done before the fun starts. Packing the bike.
THE ESSENCE OF A GOOD RIDING TRIP
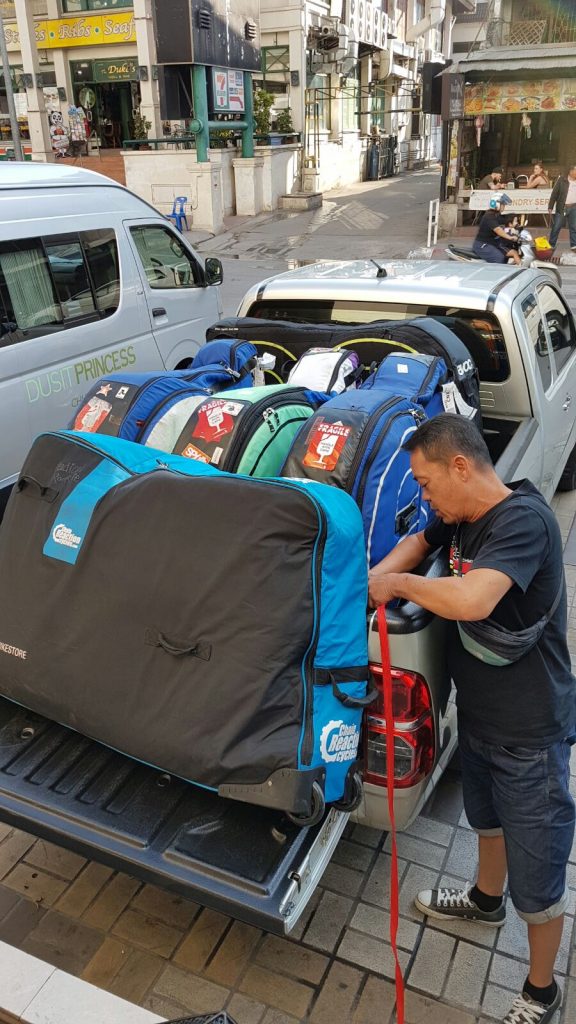
Life would have been a lot simpler if we could just roll our bikes into a big box that comes with all the needed cushioning and insulation, secure the rig, lock the box’s cover and send it to the airport. And life would be even more beautiful if all airport cargo handling staff know just exactly how “delicate” are bicycles are – even for those that were built like tanks.
The optimal performance of our bikes is directly related to the fun that we would be enjoying in our bike trips (other factors remaining constant). And since most of us treasure our bikes beyond it actual retail value, it makes lots of sense to make really sure that it arrives at our biking destination in as good shape as we are.
START PACKING
Back to reality now. Let’s do this step by step. the good thing is once you have packed your first bike, it would be a lot easier the next time you do it again. And to ensure things go as efficiently as possible, this article aims to help every reader derive his/her own personal checklist and procedure.
PREP 1: DRAW UP A LIST AND INSPECT YOUR BIKE
Different folks have different needs. And different bike trip calls for different equipment. Go through the whole riding itinerary in your head and note down the stuff you would need. A coffee session with your riding mates would be the best (if you are traveling in a group). We have a sample list to start you off below. Go through the steps and then check out the list. Modify the list to your own trip’s need.
PREP 2: GATHER ALL THE STUFF IN YOU LIST
With a framework of what you would need for your trip, it’ time to go dig out the stuff from storage. Or buy them if you do not already have them. This could be anything from thermal wear to trail tools to emergency first aid items.
NOW YOU ARE READY TO PACK YOU BIKE INTO A BAG.
You can pack with or without a checklist. The difference is simply – you pack faster and would be less prone to missing out any item with a checklist on hand. Of course, there would be folks that would say they can always purchase the left out item should they really need it, or they are sure that at least one friend would have them, so there’s nothing to worry about. Our answer to you is this: don’t bet on the availability of some stuff in a foreign destination unless you know the place really well and nobody owes you your enjoyment, respectively.
Let’s start packing.
Note: This procedure is suitable for most riders who do not own a work stand.
STEP 1: REMOVE THE WHEELS
Once you got your bike bag ready, place the bike next to (or near it). Shift the drivetrain into its smallest gear (cog), remove both the wheels from the bike and replace the axle back onto the frame. If you have dummy axles, use them for the fork too. This would protect the frame from side impacts that would otherwise press and stress the frame.
STEP 2: DETACH REAR DERAILLEUR AND PEDALS
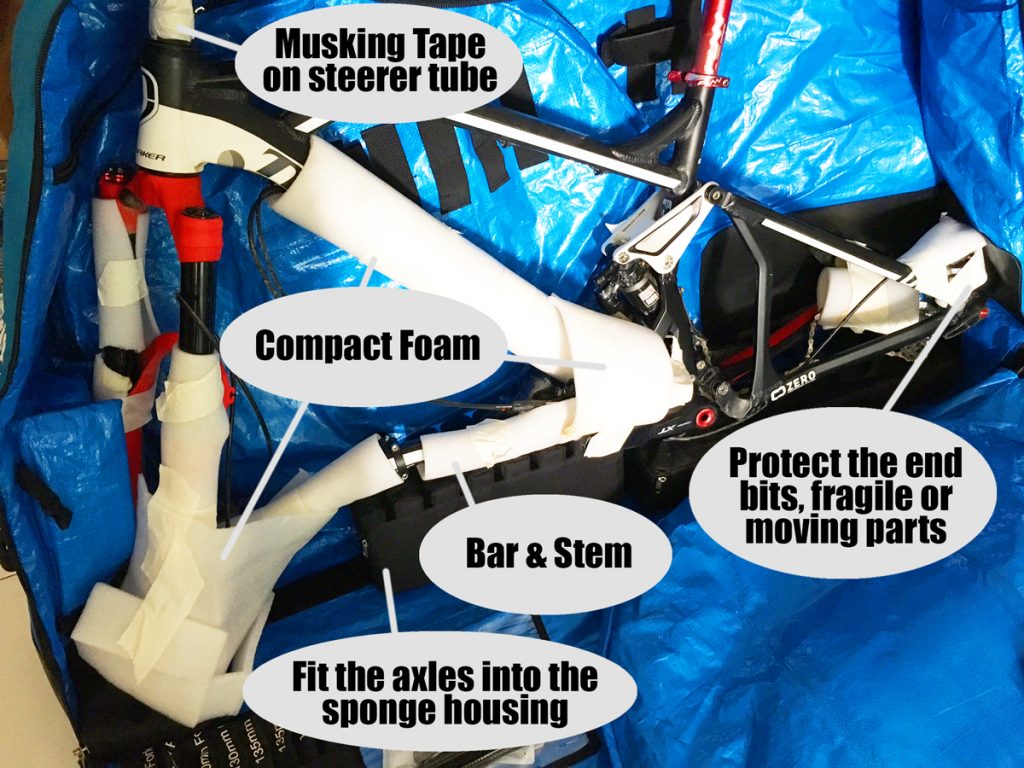
Next, remove the rear derailleur from the frame, at the same time making sure ALL the bolts are screwed back into position. If you have some compact insulating foam, now is the time to wrap them around the derailleur and bolts and fasten them into position with non-marking masking tape.
To keep the detached derailleur from swinging about, tape the derailleur onto the chain arm or chain stay of your bike with more masking tape. Do insert some foam between the items so that the surface do not rub against each other.
Remove the pedals. Keep them in the bike bag.
STEP 3: BRAKES
With the brakes away from the rotor, there is a risk of the brake lever accidentally depressed and causing the brake calipers to clamp together. This would delay your assembly later. If you have the brake caliper wedge, push them between the brake pads and secure with some masking tape. If you do not have these wedge, just use any plastic card (expired commuter card or credit card etc).
STEP 4: DETACH HANDLE BAR PLUS STEM
With the bottom section taken care of, it’s now time for the cockpit.
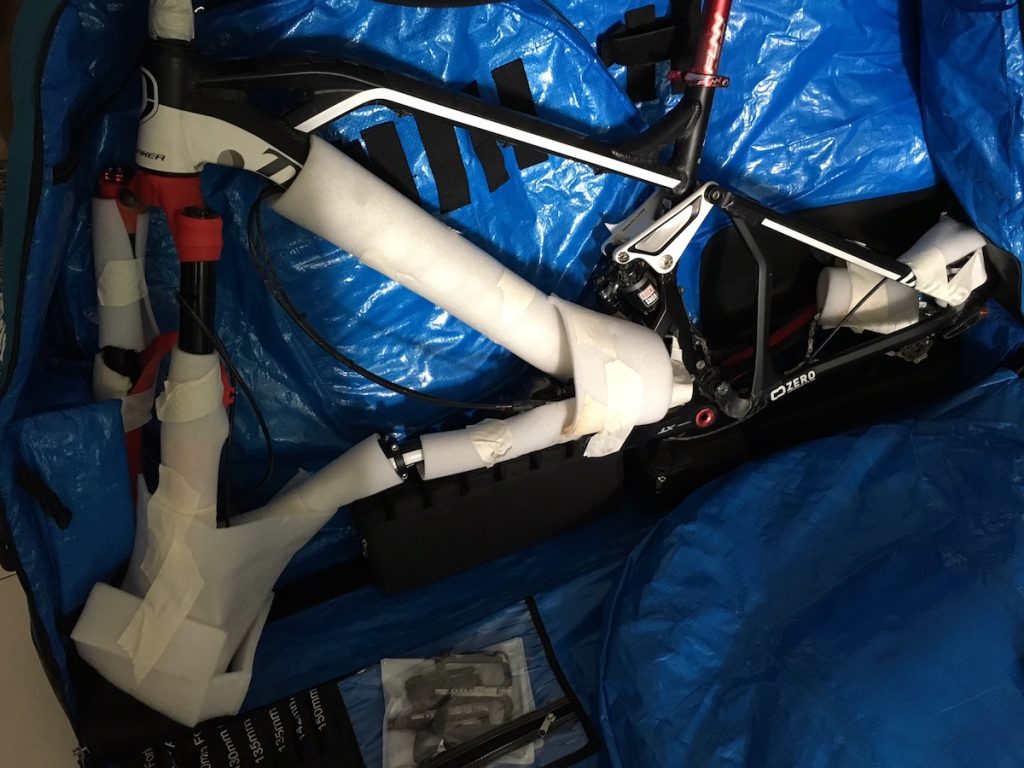
With the bike bag fully open, step forward and place the bike onto the cushioned and grooved paddings inside the bike bag. Good bike bags should have grooves for you to secure your fork and frame axles.
There would also be velcro straps for you to secure the frame and fork.
This is also the time for the more meticulous riders to add more compact foam to wrap around the fragile bits on the bike. This could be the fork stanchion, the stays, brakes and the rear shock.
Next, remove the steerer tube bolt and the stem bolts. Detach the stem and handle bar as a unit. This would allow for less time needed to adjust the cockpit when you reassemble the bike.
Wrap the detached handle bar and stem with compact foam and then allow the bar and stem to “park” near the the frame. As there are cables on the handle bar, it will find a comfortable spot to “park” onto. Add more compact foam to that section of the frame. And then tape the bar and stem to that section of the frame.
STEP 5: DROPPER POST TO EXTEND TO MAXIMUM HEIGHT POSITION
Extend the dropper post to its maximum height so as to minimize the stress on the dropper system as well as give the bike bag some skeletal support.
STEP 6: WHEELS, TYRE PRESSURE AND ROTORS
Release about 50% of the air from your tyre. Do not totally deflate the tyres as it may result in unbeading them.
Some careful packers would remove the rotors from the wheels and place them in a cushioned section of the bike bag. From experience, if the bike bag is to suffer impact, there is still a chance of bending the rotors.
If removing rotors is not your choice, simply make sure you place the rotor side of the wheel set facing the inside of the bag when sliding them into the wheel pockets. As in, not facing the outer walls of the bike bag.
STEP 7: ADD MORE PROTECTION
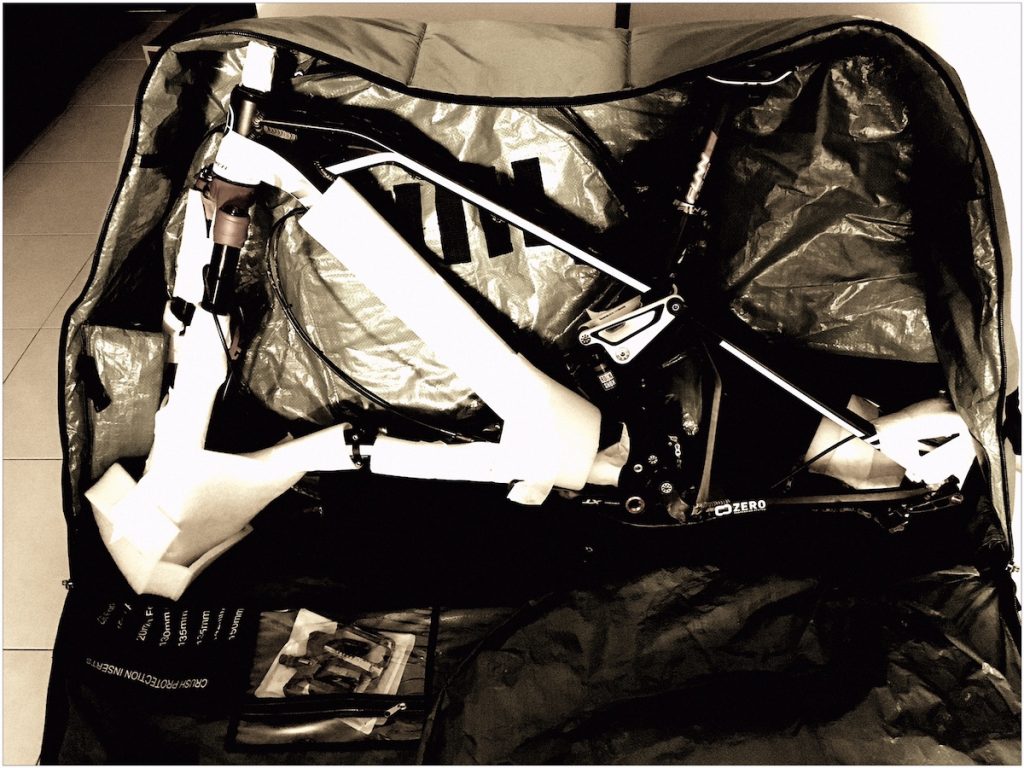
All done? Look through all the corners of your packed bike again and check if there are potential danger spots which may result in your precious rig getting unnecessary impact. If there are, add more compact foam.
STEP 8: DO YOU HAVE A FULL BIKE INSIDE THE BAG?
Finally, it seems the whole bike is in the bag. Are all the bolts, axle, pedals and whatever stuff you removed from the bike already in the same bag? Run through the whole bike in your head once over before you continue.
Pack the basic tools (at least) into the same bike bag. You would want to have, at least, enough tools to assemble your bike even in the unlikely case of losing your clothing luggage.
Weigh your packed bike bag now. Are there still room for some other stuff?
Consider packing your armor, riding shoes, hydration gear and one set of riding wear into the same bike bag.
All set!
Note: We practice the use of compact foam for added protection. Some riders do not believe in this at all. So it’s really up to rider preference.
BONUS STEP: AT THE AIRPORT
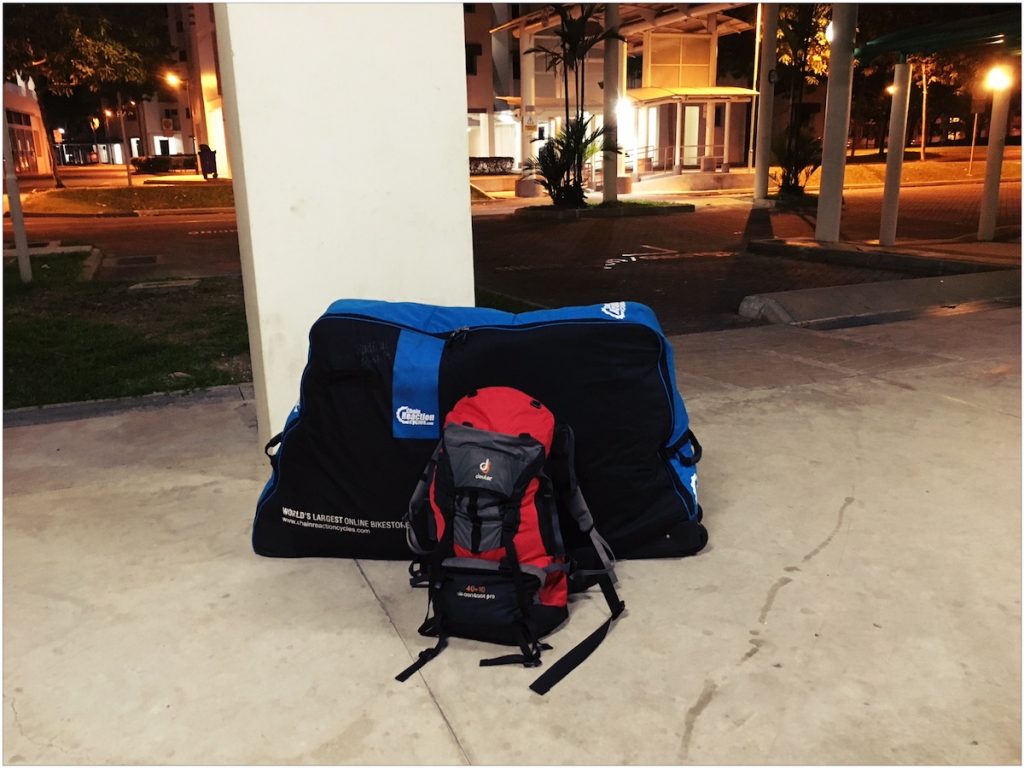
Make sure your bike bag is within the weight limit set by the airline and airport you are taking. You WILL be asked to remove extra weight before you are allowed to check in.
And on arrival at the destination airport, give the bike bag a quick check to see if there are any damaged parts or signs of impact to the bag. While you may not have time to check the content of the bike bag, you should take note of any tell-tale signs (i.e. snap some photos) of impact and alert the relevant desk about this before leaving the airport. This would help you in any insurance claim should you really get down to that.
PACKING LIST FOR A BIKE TRIP
Now for a quick check list on what to bring for your bike trip. (Cos bike trips are special …)
RIDING CLOTHES
| 1 | Trail or Full Face Helmet | |
| 2 | Cycling Shoes | |
| 5 | Cycling Gloves | |
| 6 | Cycling Shorts | |
| 7 | Socks | |
| 8 | Leg Warmers or Tights | |
| 9 | Short-Sleeved Shirt / Jersey | |
| 10 | Long-Sleeved Jersey | |
| 11 | Rainy Day Clothing | |
| 12 |
ADDITIONAL RIDING GEAR
| 1 | Neck Brace | |
| 2 | Chest and Back Armor | |
| 3 | Elbow Pads | |
| 4 | Knee Pads | |
| 5 | Goggles | |
| 6 | Sunglasses | |
| 7 | Bandana | |
| 8 | Riding Camera with mounts | |
| 9 | Spare Batteries | |
| 10 | Wrist / Ankle or Knee Support | |
| 11 | Hydration Pack with Water | |
| 12 | Hydration Pack Waterproof Cover | |
| 13 | Energy Bar | |
| 14 | Insect Repellant | |
| 15 | First Aid Dressing | |
| 16 | Sunblock | |
| 17 | Tissue Pack or Paper Napkins | |
| 18 | Multi-Tool | |
| 19 | Mini Air Pump | |
| 20 | Spare Tube | |
| 21 | Tyre patch Kit | |
| 22 | Pocket Knife | |
| 23 | Local Currency | |
| 24 | Walkie-Talkie | |
| 25 | Emergency Identification Device or Disc or Card | |
| 26 | Zip Ties | |
| 27 | Ziploc Bags | |
| 28 | Extra nuts or bolts |
ADDITIONAL TOOLS AND SPARES YOU MAY WANT TO BRING ALONG
| 1 | Full Set Allen Key | |
| 2 | Frame Dropout | |
| 3 | Derailleur Hangar | |
| 4 | Spare Rotors | |
| 5 | Brake Pads | |
| 6 | Lubricants | |
| 7 | Spokes | |
| 8 | Duct Tape | |
| 9 | Chain Tool | |
| 10 | Spare Chain links or full chain and Missing Link | |
| 11 | Brake Hose | |
| 12 | Derailleur Cable |
FOR LONG OVERNIGHT OR CAMPING RIDES
| 1 | Basic Toiletries | |
| 2 | Light/Thin Towel | |
| 3 | Lights | |
| 4 | Candles and Lighter | |
| 5 | Cooking wares or simple crockery | |
| 6 | Food! | |
| 7 | Ground sheet | |
| 8 | Sleeping Bag | |
| 9 | Jacket | |
| 10 | More First Aid Kit | |
| 11 | Water Purifier or filter | |
| 12 | Swim wear | |
| 13 | Body Powder | |
| 14 | SOS Item | |
| 15 | Extra Clothes |
Note: Above list are suggestions only. List varies for different types of trip as well as rider expectations.
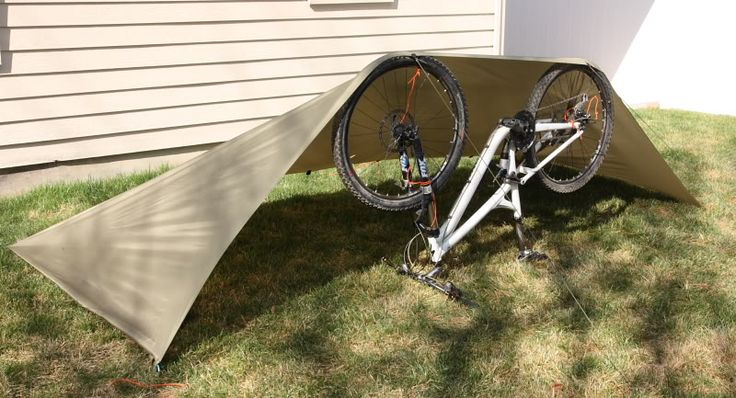
(One way to pack light and use the bike to help pitch a tent. Photo credit: Pinterest)
With the equipment list having a rolling start, the next golden question would be: Where will you ride?
Have Fun!
LIKE and FOLLOW us: Bikezilla Facebook Page • Bikezilla Bikers Singapore Group Page • BikezillaSG Instagram • Bikezilla STRAVA
All photos by Bikezilla
Bike Tent photo by Pinterest