TECH: SOME SOLUTIONS FOR A SLIPPING DRIVE TRAIN

Like bicycle creaks and noises, slippage can be hard to track down. You'd swear up and down, left and right, forwards and backwards and you know that it's a certain component that's slipping, but in the end, it turns out to be something completely different. (I know, I've been there and done that!)
START EASY
The key is to start easy and cheap, making each component prove itself and by using a process of elimination. Try to avoid buying all kinds of expensive parts before trying the cheap stuff first. Here are some tips for solving drivetrain slippage.
1. Hub Bearing Pre-load
The first thing to do when there’s slipping is to adjust the pre-load on the hub and it’s easy to do. Take the wheel out of the frame of course, then loosen the set screw in the clamp, unscrew the clamp and remove it from the axle. (except for the 2.5mm hex wrench, use no tools, this is all done by hand.) Pull out the axle, then pull the cassette away from the hub with it still attached to the drive shell body. (While the rear hub is disassembled, visibly check for signs of damage such as worn or broken parts or bearings. Use a light so you can really see and check the existing lubricant for signs of any metal shavings in it.) Then, snap the cassette and drive shell back in the hub, making sure it is fully seated with an audible click. If you don’t get that click, try again, rotating a little while you are pushing it in, again all by hand, no tools. Then, put the axle back in by hand, no click here, just make sure it won’t go in any further, by hand, no tools. Screw the clamp back on, and here’s the bearing pre-load part: with the set screw of the clamp still loose, gently tighten the clamp until it just touches the bearing.. that is just until it stops turning easily. Then tighten the clamp just a little bit more, about 3-4 mm of rotation, that’s all. Tighten the set screw on the clamp, snug but not too tight, it’s normal for a gap to remain. If pre-load was the problem, that will take care of it. (You can also refer to the information on the Chris King website for service information.)
2. Hub Lubrication
Chris King recommends that in most every case, their Ring Drive Lube is the only lubricant that should be used. Also, excess lubrication can cause slippage at any temperature, but especially in cold weather. While you are checking for pre-load, also check for excess lubricant or the use of a non-approved lubricant. Of course, lubrication is required, it is only excess lubrication that can potentially cause problems. Update: Recently it seems, the Chris King factory has been approving the use of regular 10W-40 non-detergent oil, so that is also something to investigate. Please refer to the Chris King manual for your hub regarding proper lubrication.
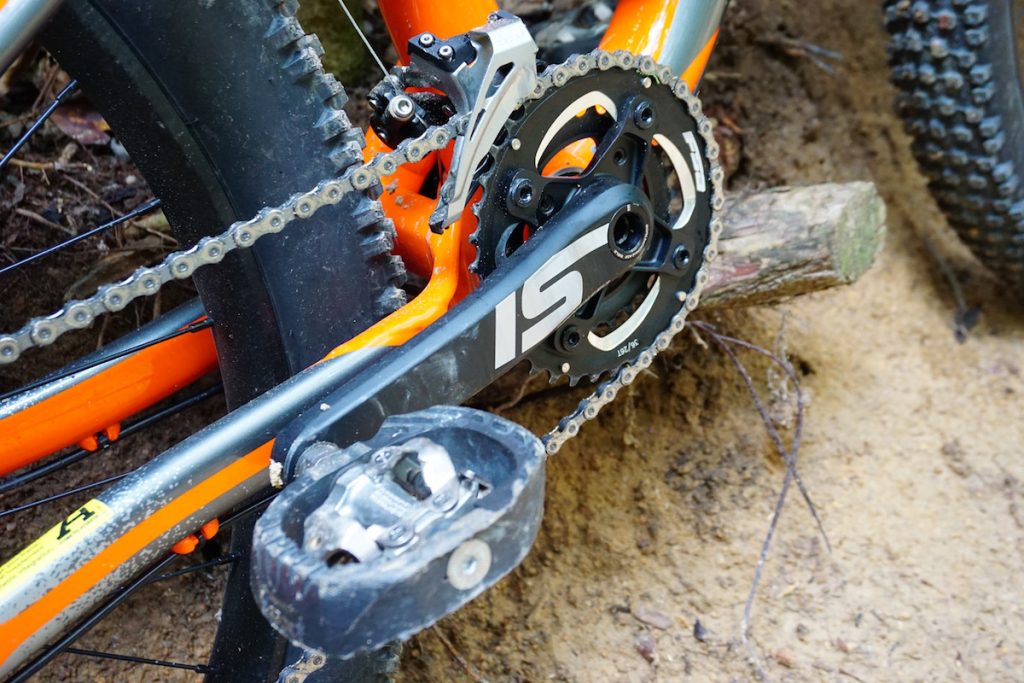
3. Drivetrain
If there have been any drive train changes lately or if the drive train is worn, that can cause slippage and it may feel like it's the hub. For example, the front chain rings, chain and cassette wear into each other over time. Just changing one of these without changing the others can cause slippage. The drivetrain may be especially suspect for slipping if any drive train component has been recently changed. A chain wear checker is a useful tool as part of this process.
So does what I've gone over above cover every possible cause of drive train slippage? Of course not. But it's a great place to start and I hope it comes in handy if you should ever need it.
In any event, Happy Riding from Mike & the Team @ AVT.BIke!
Special thanks to Mike and the Team @ AVT.Bike (friendly online store for some of the best component brands) for the content share. Stay tuned for more technical articles from the team!